
You've been climbing the same grade for months. The moves look manageable, your feet are usually accurate, and your body feels capable, yet the small edge halfway through the problem keeps opening your hand. On a lead route, you reach the crux with enough energy to move, but your forearms won't produce another reliable contraction. More climbing may improve your movement, but it won't always fix the specific strength or fatigue-resistance gap that keeps making that hold feel impossible.
Effective grip strength training for climbing is more precise than squeezing a hand gripper until your forearms burn. It targets the finger positions you use, measures progress on repeatable edges, and balances short maximal efforts with the ability to keep producing force late in a session. The best plan also respects the difference between bouldering and lead climbing, because powerful moves and prolonged forearm work place different demands on your hands.
Table of Contents
- Why Grip Strength Decides Your Climbing Grade
- How to Test Your Current Grip Strength Accurately
- Essential Grip Types and Tools Every Climber Should Train
- Building Your Progressive Training Program That Fits Climbing Days
- Warm Up Mobility and Injury Prevention for Stronger Fingers
- Summary
- Frequently Asked Questions
Why Grip Strength Decides Your Climbing Grade
A climber can look technically polished and still fail because the fingers cannot maintain force on the hold. That failure often gets labeled a technique problem. Sometimes it is. But if your feet are placed well, your hips are close to the wall, and your hand still peels from a small edge, the limiting factor may be finger-position-specific strength, not movement knowledge.
A 2025 systematic review and meta-analysis found that climbers had significantly higher grip strength than non-climbers, with a standardized mean difference of 1.82. The review also found superior underarm endurance among climbers, with a standardized mean difference of 0.70. Those findings support what coaches see on the wall, stronger climbers generally combine hand force with the capacity to keep their upper body working under repeated effort. The systematic review and meta-analysis reported that higher-level climbers consistently outperformed lower-level climbers in finger strength, grip strength, forearm endurance, and powerslap. For foundational climbing training concepts, the British Mountaineering Council training resources offer useful background as well.
Crush grip is not the whole problem
A dynamometer or hand gripper measures a broad squeezing action. Climbing asks for more specific solutions, including an open hand on a rounded hold, a half-crimp on a shallow edge, a pinch around a sloping volume, or a three-finger drag when the index finger must stay relatively relaxed.
The same 2025 evidence found that boulder climbers had higher finger strength than lead climbers, with a standardized mean difference of 1.08, while discipline differences and climbing level were not identical across every grip measure. A separate comparison reported significantly better isometric strength in climbing-specific grips such as the three-finger drag and half-crimp, while conventional handgrip differences weren't significant. The comparison indexed by PubMed helps explain why generic squeezes often feel productive without transferring clearly to harder climbing.
Coaching rule: Train the position that fails on the wall, not the exercise that produces the biggest pump in your living room.
Bouldering usually rewards high force over brief, intense sequences. Lead climbing demands that force repeatedly after the forearms have already worked. A 2023 endurance climbing study found that after 24 hours of climbing, mean grip strength fell by 14.3 to 15.0 pounds, a 14.7% to 15.1% decrease, while static hang time dropped by 54.2 seconds, a 71.2% decrease. The Frontiers study makes the practical point clear. Raw strength matters, but fatigue resistance determines whether you can still use that strength deep into a long session or competition. For examples of how elite climbers pace effort across disciplines, the International Federation of Sport Climbing is also worth browsing.
How to Test Your Current Grip Strength Accurately
Don't begin a training block by guessing. Establish a repeatable baseline that tells you which grip position, edge size, and loading method deserve attention. Testing should be simple enough to repeat and controlled enough that a better result reflects adaptation rather than a different hold or a better warm-up.
Use a fixed edge and consistent positions
For standardized monitoring, use a fixed-depth edge of approximately 20 to 23 millimeters. A review of grip and finger-strength assessment found that maximal isometric tests on edges in this range consistently show high reliability and should be prioritized for repeatable testing. The assessment review supports using the same edge every time rather than comparing hangs performed on random gym holds.
Start with a thorough general warm-up, then prepare the fingers through easy climbing or progressively heavier submaximal pulls. Test one hand at a time if you have a force gauge or no-hang device, or test timed hangs with both hands if your setup doesn't measure force directly.
Use the following protocol:
- Choose your edge: Keep the depth near the 20 to 23 millimeter range and record the board or device used.
- Set your grip: Test an open-hand position, a half-crimp, and a three-finger drag if your equipment allows it. Keep the wrist neutral and avoid changing finger placement between attempts.
- Select your load: Use bodyweight for a timed hang or add load for a maximal isometric test. Don't turn the test into a sloppy failure attempt.
- Control the effort: Pull hard while keeping the shoulders engaged and the fingers in the planned position. Stop when the position breaks, not after you compensate with a different grip.
- Record the result: Log grip position, edge depth, added load or bodyweight, hang duration, perceived effort, and any discomfort.
Test strength and endurance separately
A maximal force test answers, “How much force can I produce in this position?” A timed hang answers, “How long can I maintain a defined position?” They overlap, but they aren't interchangeable. A climber may have a strong half-crimp and still lose it quickly after repeated boulder attempts or sustained lead climbing.
Retest on a predictable schedule, such as at the end of a training block, rather than testing every session. Keep the warm-up, edge, grip, rest, and measurement method consistent. A digital hand dynamometer can add useful information, but it shouldn't replace climbing-specific edge testing when the goal is transfer to rock or plastic. If you want a general overview of grip measurement norms outside climbing, the Cleveland Clinic grip strength guide adds context.
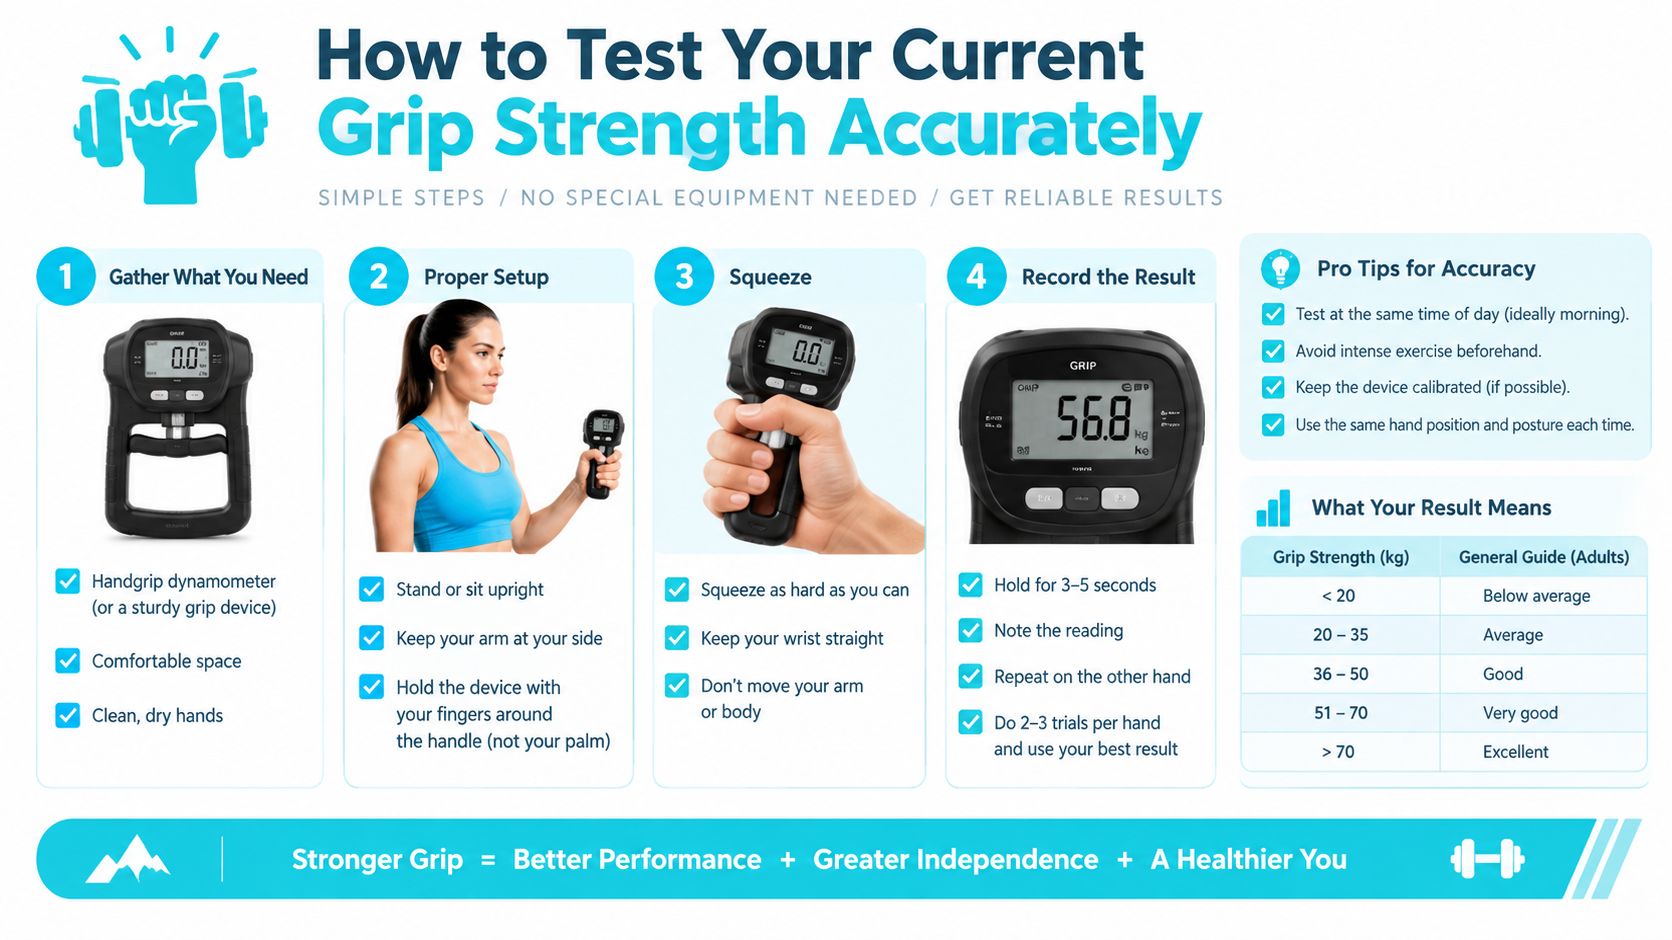
Don't chase a universal “good” number. Your baseline should answer whether your half-crimp is lagging behind your open hand, whether your force drops sharply across repeated efforts, and whether your results match the demands of your discipline. A useful test is one you can repeat, interpret, and use to choose the next training load.
Essential Grip Types and Tools Every Climber Should Train
The right tool depends on the grip you need to improve. A hangboard is excellent for controlled finger-flexor isometrics, but it won't automatically train pinch strength. A pinch block can build thumb opposition and finger pressure, yet it won't reproduce the body tension and shoulder position of a hanging edge. Choose equipment by transfer, not novelty.
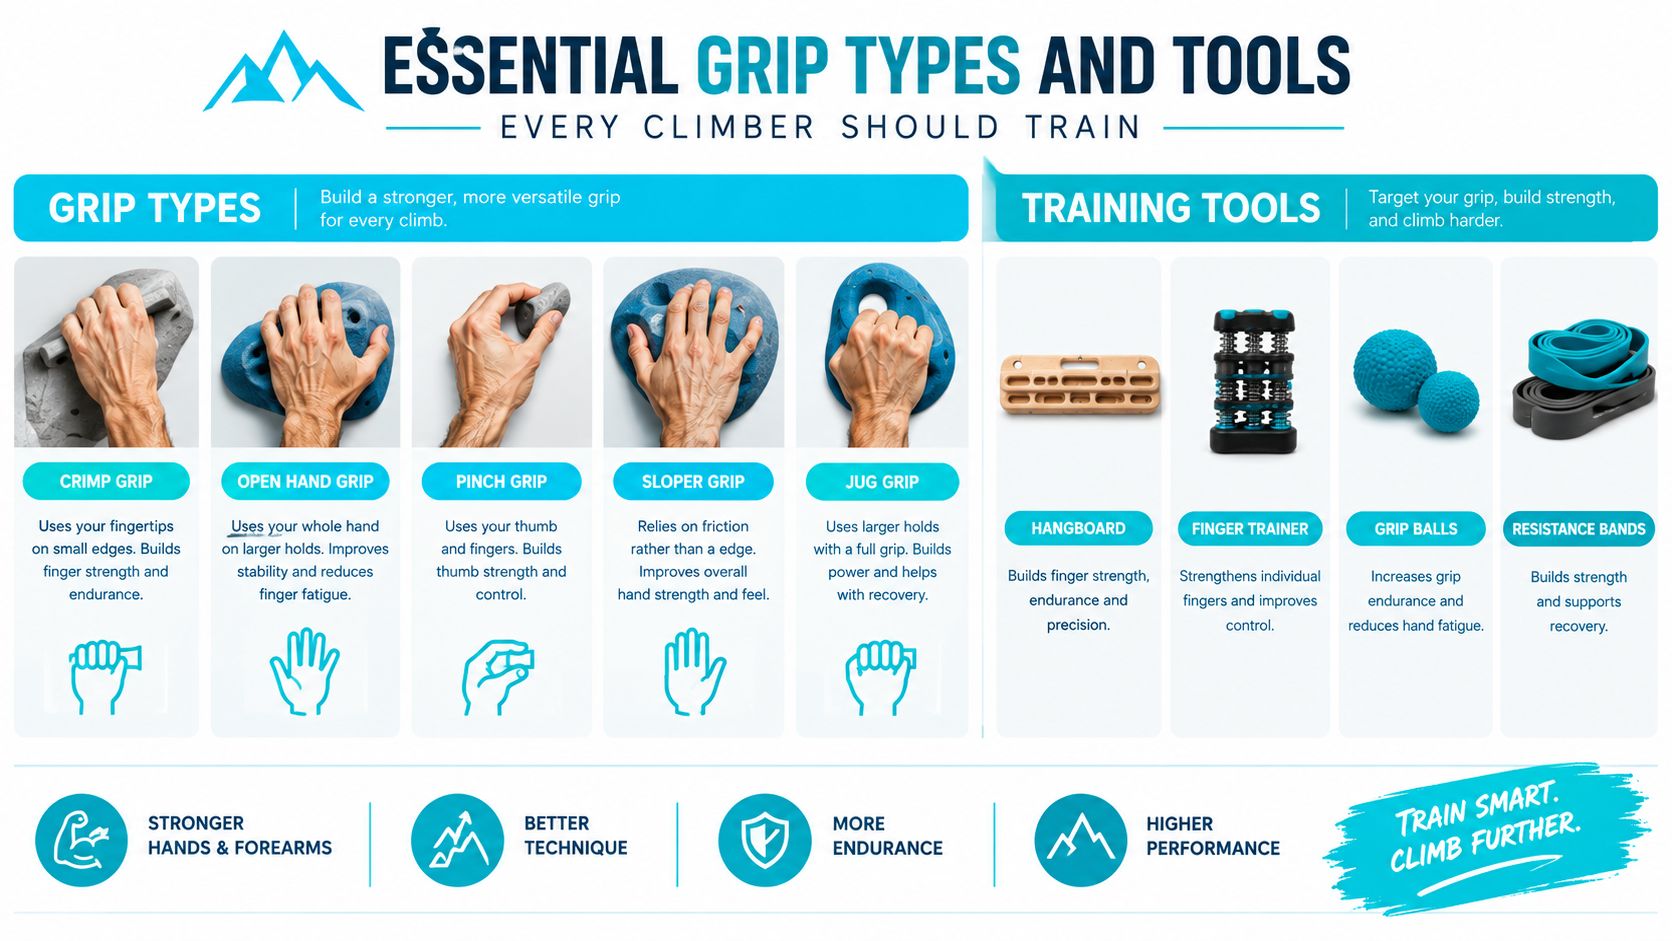
Match the grip to the demand
Open hand keeps the fingers extended and spreads pressure across the hand. Use a comfortable sloping edge or rounded hangboard hold. It has strong relevance for slopers and holds where forcing a crimp would create unnecessary stress.
Half-crimp places the fingers in a more flexed position without wrapping the thumb over the index finger. It commonly resembles the position required on small edges. Train it on a fixed-depth hangboard edge, but keep the wrist and finger shape consistent.
Three-finger drag emphasizes the middle, ring, and little fingers while allowing the index finger to contribute less. It can be trained with a three-finger edge or a no-hang device. The position is especially useful when a hold doesn't allow a full four-finger contact.
Pinch combines the thumb with the fingers on opposite sides of a hold. Use a pinch block, weight plate pinch, or no-hang attachment. Pinch work deserves its own slot because squeezing a cylindrical hand gripper doesn't reproduce thumb opposition.
Full crimp loading has a place in climbing, but it shouldn't become your default training position. If a route requires it, introduce it conservatively and only when your fingers can maintain the position without pain or collapsing into an uncontrolled effort. Practical movement libraries from Lattice Training can also help climbers connect grip work to actual wall demands.
| Grip Type | Best Tool and Edge | When to Use It |
|---|---|---|
| Open hand | Rounded hangboard hold or comfortable edge | Slopers, rounded holds, and general finger capacity |
| Half-crimp | Fixed-depth edge around 20 to 23 millimeters | Small edges and controlled maximal-strength work |
| Three-finger drag | Three-finger edge or no-hang attachment | Reduced-contact holds and finger-specific strength |
| Pinch | Pinch block or no-hang pinch device | Volumes, aretes, pinches, and thumb-dependent moves |
A campusboard can expose you to dynamic pulling and contact demands, but it isn't a substitute for controlled strength work. Use it when your climbing base and finger tolerance support it, not because dynamic movements look more advanced. No-hang devices are useful when you need portable loading, unilateral testing, or a way to train without hanging your full bodyweight.
Climbing also depends on how your hips and shoulders let you place the body beneath the hand. If limited lower-body movement forces you to overpull, a resource on better hip mobility can complement your grip work. Better finger strength won't rescue every inefficient body position.
Building Your Progressive Training Program That Fits Climbing Days
A hangboard block works when it supplements climbing instead of competing with it. The 2022 systematic review and meta-analysis found that adding climbing-specific resistance training, including fingerboard, campusboard, or upper-body resistance work, improved climbing-specific test outcomes compared with regular climbing alone, with a moderate overall effect size of 0.57. The same review found improved finger strength when isometric finger resistance training was compared with climbing alone, with an effect size of 0.41. The resistance-training review also cautioned that finger-flexor resistance work doesn't consistently improve climbing-specific tests unless the program is targeted.
Set the training dose before adding difficulty
Beginners should start with easy, repeatable hangs and focus on position. Use an edge that lets you keep the planned grip without pain, shoulder shrugging, or emergency foot support. The first goal is not a heroic load. It is learning to produce force while maintaining a stable half-crimp, open hand, or three-finger drag.
Intermediate climbers can use structured maximal hangs and lower-intensity repeaters in the same broader block. Advanced climbers can add load, reduce edge size, or use unilateral no-hang variations, but only one major difficulty variable should change at a time.
A practical progression menu looks like this:
- Beginner: Use controlled hangs with generous rest. Add time only while the grip shape remains unchanged.
- Intermediate: Alternate maximal isometric work with lower-intensity repeat efforts. Increase added load before shrinking the edge if the current position is stable.
- Advanced: Use force-based testing, weighted hangs, and targeted no-hang work. Reserve smaller edges or more demanding positions for a clear performance reason.
Keep the effort honest. If your shoulders lose engagement or your fingers shift from half-crimp to open hand, the set has changed. Record the result as a technical failure rather than pretending it was a successful heavier hang.
Combine static and dynamic work
A 2023 systematic review of strength training in climbing found positive effects on all measured variables, with a trend favoring mixed strength and hypertrophy or endurance programs and a combination of static and dynamic climbing-specific exercises. The strength-training review supports a program that develops both force production and the ability to express strength through movement.
Static work may include weighted hangs, no-hang pulls, and controlled isometric pinches. Dynamic work can come from climbing itself, carefully selected campus movements, or upper-body exercises that reinforce pulling mechanics. The selection should serve your climbing, not replace it with a collection of impressive-looking drills.
A 10-week supplemental hangboard program in intermediate to advanced climbers was reported as highly effective for increasing maximal finger strength compared with continuing regular climbing alone. A separate 4-week finger-grip program increased maximal force and rate of force development in elite and top world-ranking climbers. The finger-grip training research also notes that low-intensity loading can be as effective as maximal loading for grip-strength gains, while combining low-intensity and maximal work may produce additive benefits. For general resistance programming principles, the National Strength and Conditioning Association has additional reading.
Schedule around the wall
Don't place your hardest hangboard session immediately before a limit-bouldering day. Both sessions ask the fingers for high output, and the second session will usually suffer. Lead climbers also need to protect the quality of sustained climbing, so a fatigue-focused grip session belongs where it won't compromise the key route session.
Use a simple weekly rhythm:
- Hard bouldering day: Limit attempts and powerful climbing take priority. Skip extra maximal finger work afterward if the fingers are already exhausted.
- Recovery or easy climbing day: Use mobility, easy movement, and optional low-intensity finger loading.
- Strength day: Perform the planned maximal or supplemental hangboard work while fresh.
- Lead-focused day: Prioritize route volume, pacing, and forearm fatigue resistance.
- Rest day: Let performance and connective tissues recover.
Train less often when climbing intensity rises. Progress when the same edge, grip, and load feel controlled across all planned sets, not when you just survive one attempt. A block of supplemental work should sharpen a measurable weakness while leaving enough energy to climb well.
Warm Up Mobility and Injury Prevention for Stronger Fingers
Strong fingers aren't useful if pain forces you off the wall. Injury prevention starts with managing the interaction between intensity, grip choice, climbing volume, and previous problems. A systematic review of overuse injury risk found associations with higher climbing intensity, bouldering, reduced grip or finger strength, crimp use, and previous injury. It also reported that a strength-training intervention prevented shoulder and elbow injuries, while BMI or body weight, warm-up, cool-downs, stretching, taping, and hydration weren't associated with overuse injury risk in the reviewed evidence. The injury-risk review supports a broader approach than just adding more stretching.
Prepare the tissues for the actual task
Begin with general movement that raises temperature, then use easy climbing to rehearse footwork and progressively load the fingers. Add controlled tendon-glide patterns, wrist circles, gentle finger extension, and gradual exposure to the grip positions you'll train. The loading should build toward the session, not jump from inactivity to maximal crimping.
For more general exercise preparation, the SunnyBay warm-up guide offers useful context. For climbing, the key adjustment is specificity. Your final warm-up pulls should resemble the edge depth and grip position of the planned work, but at an easier intensity. If you want broader injury prevention guidance for active adults, the American Academy of Orthopaedic Surgeons exercise conditioning pages can be helpful.
Use symptoms to control the session
Sharp pain, localized tenderness, altered finger tracking, or a grip that suddenly feels unstable are reasons to stop the hard set. Don't test through a warning sign just to preserve the spreadsheet. Switch to pain-free movement, reduce the load, or end the finger session and address the issue with an appropriately qualified clinician.
A useful training log includes grip position, edge depth, load, completed sets, perceived effort, and symptoms during and after the session. You can use the Thrive X Fitness app for plan tracking and form checks, including its approximately 60-second clip review, while keeping the actual loading decisions conservative. Video can reveal a shrugged shoulder or changing finger position, but it can't diagnose a tendon injury.
Load-management cue: If the fingers need a different grip to finish the set, the planned load was too high for that position.
Recovery also means avoiding accidental overload. Don't add a maximal hangboard session after a high-intensity bouldering session just because it appears on the calendar. Keep the strongest work fresh, make lower-intensity work easy, and adjust the week when climbing volume or route intensity changes.
Summary
Effective grip strength training for climbing targets the positions used on rock, including open hand, half-crimp, three-finger drag, and pinch, rather than relying on generic crush-grip exercises. Fixed edges around 20 to 23 millimeters make testing more repeatable. Hangboards, no-hang devices, pinch blocks, and carefully selected dynamic work each have a role. Supplemental training should progress alongside climbing, while warm-ups, symptom monitoring, and load management help protect the fingers, shoulders, and elbows.
Frequently Asked Questions
Are hand grippers enough for climbing?
Hand grippers can train a broad squeezing action, but they don't reproduce the finger positions that commonly determine climbing performance. Half-crimps, open-hand grips, three-finger drags, and pinches place different demands on the hand. Use climbing-specific edges, no-hang devices, or pinch tools when you want the exercise to resemble the hold position that limits you on the wall.
How often should I test my climbing grip strength?
Test often enough to guide programming, but not so often that testing becomes another source of fatigue. Keep the edge depth, grip position, warm-up, loading method, and recording process consistent. A repeatable retest at the end of a training block gives more useful information than frequent maximal attempts performed under different conditions.
How long does it take to improve finger strength?
Research cited in this guide reported measurable gains from a separate 4-week finger-grip program in elite and top world-ranking climbers, while a 10-week supplemental hangboard program outperformed regular climbing alone for maximal finger strength in intermediate to advanced climbers. Your result depends on training quality, recovery, climbing level, and whether the chosen grip matches your weakness.
Should I train maximal hangs or lower-intensity hangs?
Both can have a place. The cited research notes that low-intensity finger loading can be as effective as maximal loading for grip-strength gains, while combining low-intensity and maximal-load work may provide additive benefits. Use maximal hangs for controlled force production and lower-intensity work for repeatable loading and fatigue-focused practice.
How can I reduce finger injury risk while hangboarding?
Warm up progressively, use a consistent grip, and stop when pain or loss of position appears. Higher intensity, bouldering, crimp use, reduced grip strength, and previous injury were associated with increased overuse injury risk in the cited review. Don't force a heavier load when your fingers shift position or your shoulders lose control.
Build your climbing grip plan around measurable finger positions, progressive loading, and the sessions you already complete on the wall. Visit ThriveXDNA to use Thrive X Fitness for structured workout tracking, AI form review, and coaching support that can help you stay consistent without turning every session into guesswork.
Related guides
- Stop Wasting Money on Trainers: The Top 5 AI Workout Plan Generators
- more on Longevity Training vs Peak Performance: Why Chasing PRs Is
- What Is Training Volume and How to Use It
- Personal Trainer Programming That Delivers Results
- 5 Best AI Workout Plan Generators in 2026 (and Where They Quietly
- details: Post Workout Meal Guide: What to Eat After Training (and
- DNA Workout Blueprint: How To Choose Muscle Growth Workouts Based
- Training Volume Definition Explained Clearly
- How to Lose Belly Fat: What Actually Works
- Best Runna Alternatives 2026 for AI Run Coaching
- Best AI Fitness Apps for Beginners
- Recovery-First Fitness: How the “Readiness” Metric Stops
- the Thrive X Fitness training app