
A useful push sled load may create a 25%, 50%, or 75% velocity decrement, and the correct load can vary from 23% to 131% of body mass depending on the athlete and target. The sled is not just a conditioning tool; it is a doseable horizontal-force exercise that must be individualized to the desired speed reduction.
The popular advice is to keep adding plates until the sled feels brutally heavy. That approach can produce fatigue, but it doesn't tell you whether you're training acceleration, force production, speed maintenance, or general work capacity. A serious push sled training plan starts with the outcome, then adjusts resistance, surface, distance, and recovery to preserve the intended movement.
That distinction matters because the same sled can feel entirely different on different flooring, with different friction, or behind athletes with different speed capacities. The practical question isn't “How heavy is the sled?” It's “What mechanical effect does this load create for this athlete, on this surface, for this goal?”
Table of Contents
- Rethinking Push Sled Training as a Precision Tool
- Biomechanics and Performance Benefits Explained
- Proper Push Sled Technique and Common Mistakes
- Goal-Specific Loading Protocols and Workouts
- Programming Templates for Athletes and Busy Professionals
- Tracking Progress and Integrating with Coaching Tools
- Summary
- Frequently Asked Questions
Rethinking Push Sled Training as a Precision Tool
Push sled training is often dropped into a warm-up or finishing circuit as a generic grind. That use can be appropriate for conditioning, but it misses the sled's most valuable feature: you can dose horizontal resistance and observe its effect on sprint mechanics.
A 2014 dissertation quantified sled mechanics and found that peak velocity fell by about 40% to 51% when athletes sprinted with a sled compared with unresisted sprinting. The work also measured friction across six sled loads on AstroTurf and estimated the mechanical work performed during sled-push training, showing why surface, load, and athlete speed capacity all matter when prescribing resistance. If you want broader context on resisted sprint methods, this Outrank guide to sprint training pairs well with the original resisted sprint mechanics dissertation for the underlying measurements.
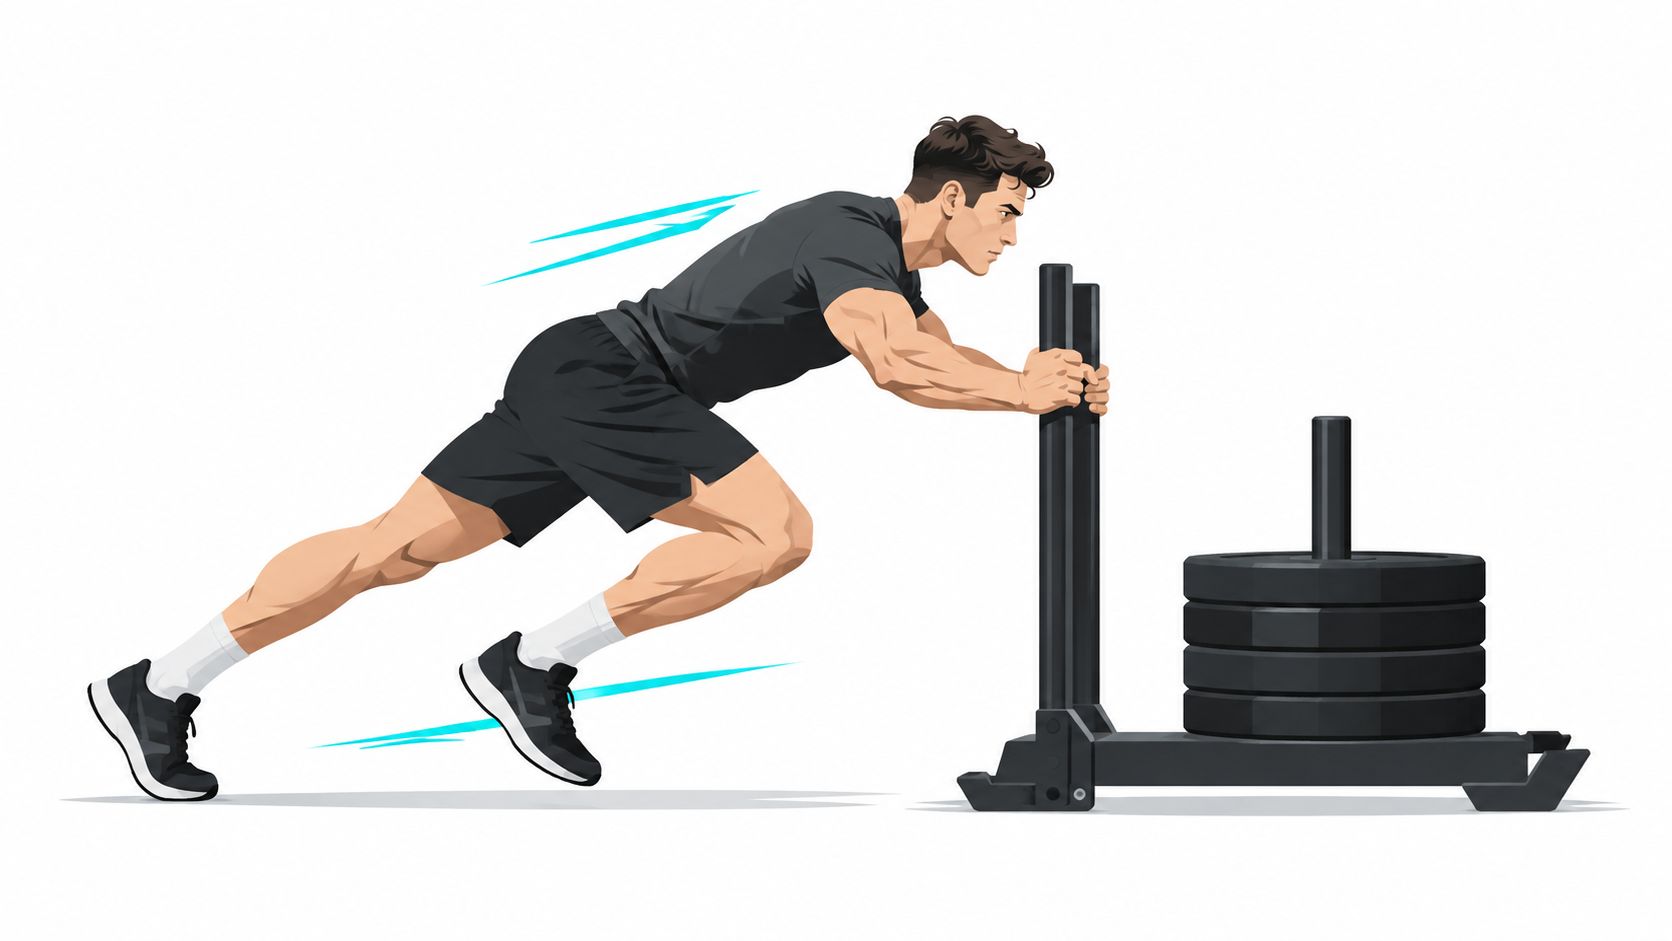
The variable most coaches overlook
The plate count doesn't describe the full stimulus. A sled that moves smoothly on one surface may demand much more force on another, while a powerful athlete may need substantially more external load than a less experienced athlete to produce the same velocity decrement.
That makes fixed body-mass rules convenient but limited. A universal percentage can be a starting point for experimentation, but it can't guarantee a particular speed-zone. If your purpose is acceleration transfer, you want to know how much the athlete slows. If your purpose is a conditioning circuit, you may care more about sustainable output and technical consistency.
Practical rule: prescribe the response you want, then select the load that creates it.
This shift also clarifies why “heavier is always better” fails as a coaching principle. Heavy resistance can be useful for force development, but it may distort stride rhythm or turn a speed-focused repetition into a slow strength effort. The right load is the one that produces the intended adaptation without allowing fatigue or friction to change the exercise into something else.
Biomechanics and Performance Benefits Explained
A sled push asks the athlete to project force horizontally while maintaining a forward body line. The legs extend at the ankle, knee, and hip, while the trunk and shoulders transmit force into the handles. The movement is concentric-dominant, with no need to absorb the same landing forces found in maximal sprinting, yet it still demands coordinated lower-body drive.
The forward lean changes the direction in which force is applied. Instead of rising vertically under a bar, the athlete pushes backward into the ground and directs the resulting force into the sled. That makes the exercise relevant to early acceleration, where the athlete must overcome inertia and build horizontal momentum.
Why the load changes the movement
A light sled can preserve more of the athlete's sprint-like rhythm, while a heavier sled increases the force demand and usually slows the movement. Neither effect is automatically superior. The useful choice depends on whether the session prioritizes speed exposure, acceleration strength, or controlled force production.
In an eight-week study of 50 male high school athletes, participants trained with unresisted sprinting or resisted sled pushes designed to create 25%, 50%, or 75% velocity decrements. All resisted groups trained twice weekly and significantly improved their 5 to 20 meter split times, with effect sizes ranging from d = 0.34 to 1.16, while the unresisted group didn't improve significantly. The study's authors concluded that resisted sled work outperformed unresisted sprinting for short-distance performance in that setting, with heavier loads potentially producing the greatest short-distance gains. The full protocol appears in the Journal of Strength and Conditioning Research study on sled-push load and velocity profiling.
That finding doesn't mean every athlete should use the heaviest possible sled. It means the coach should distinguish between a training effect created by a measured speed reduction and one created by arbitrary fatigue. A slow push with a collapsed posture may be hard, but it isn't automatically a high-quality acceleration exercise.
What the sled can and can't replace
The sled develops horizontal force and supports short-distance acceleration work, but it shouldn't be treated as a complete replacement for unresisted sprinting. Athletes still need opportunities to express speed without external resistance. The sled is most useful when it complements, rather than erases, those exposures.
Proper Push Sled Technique and Common Mistakes
Start with a stable stance, hands positioned around hip height, and a sled angle that lets you push through the frame rather than hang from the handles. Create a rigid line from the heel through the hips and trunk, then begin with short, forceful steps. The first steps should feel deliberate, not rushed.
Coaching sources disagree on the exact trunk angle because handle height and sled design change the position. One technique guide describes a 40° to 55° lean from vertical, while another recommends roughly 45° to the ground for low handles or 55° to 65° for high handles. The shared principle is more useful than any single angle: maintain a strong forward lean, a neutral spine, and a position that allows the legs to drive without the hips shooting upward. Compare the sled push technique guidance from Motra when setting up different handle heights.
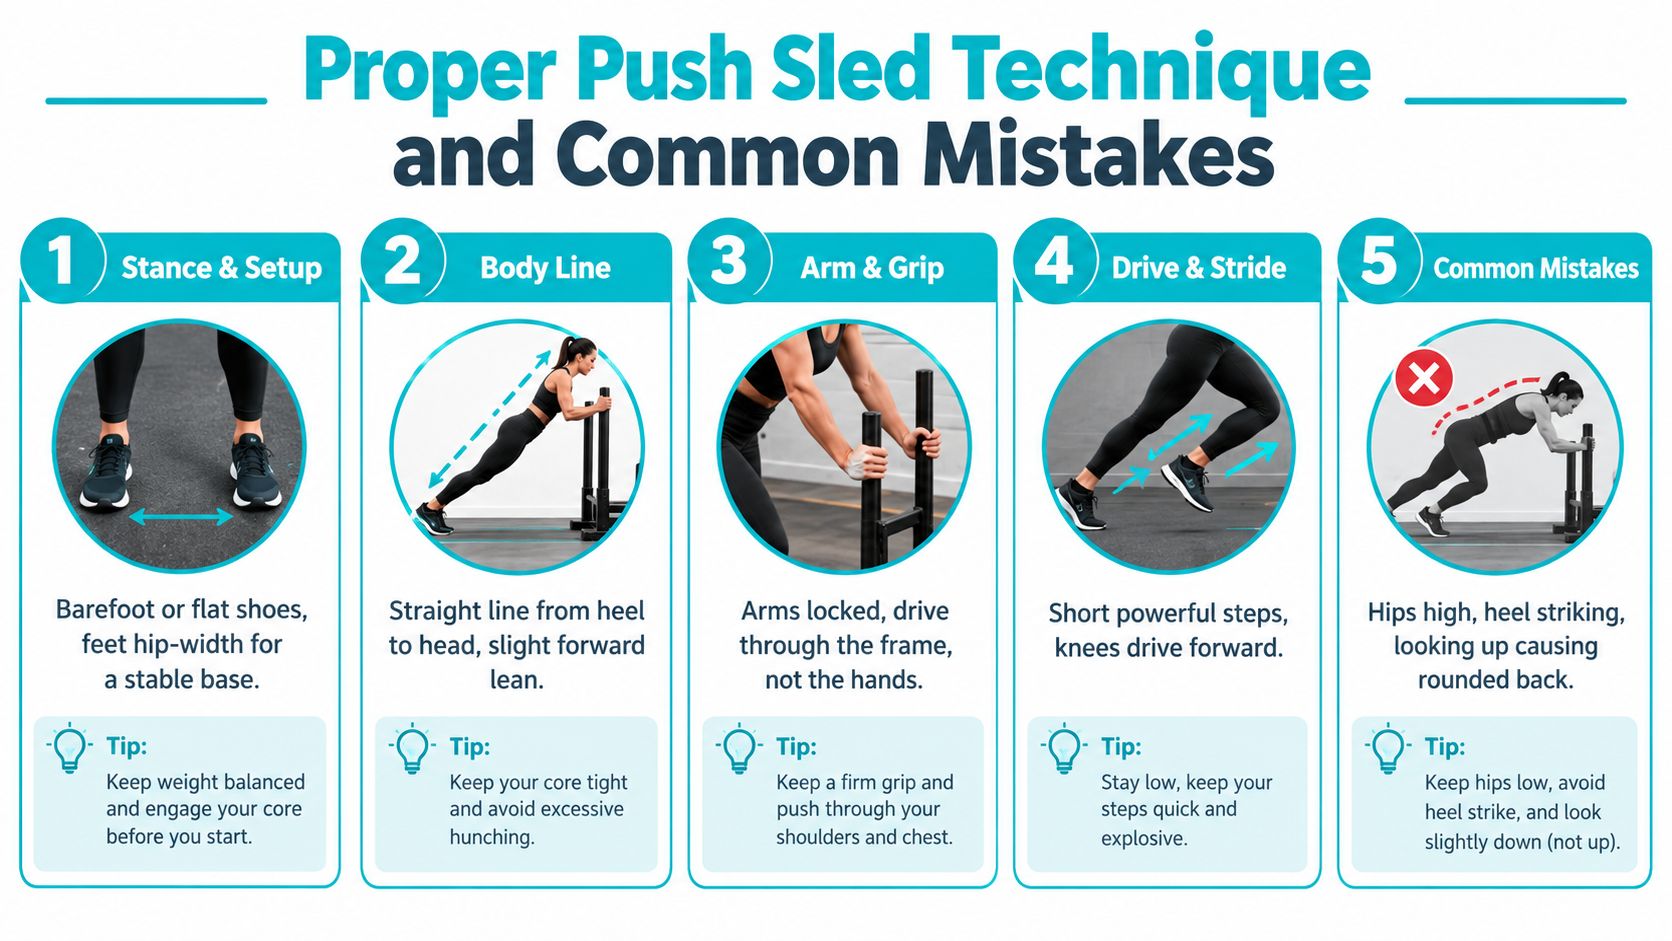
Build the position before adding load
Use these cues while the sled is still light enough to move without compensations:
- Set the feet: Keep a stable base and let each foot recover under the body rather than reaching far ahead.
- Set the trunk: Lean from the ankles and keep the spine neutral. Don't fold at the waist.
- Set the arms: Keep the elbows soft rather than locking them aggressively. The hands guide pressure into the frame, while the legs create the drive.
- Set the stride: Use short, powerful steps with active knee drive. Long steps often reduce the ability to apply force repeatedly.
- Set the finish: Decelerate under control instead of abruptly releasing the handles or standing up while the sled is still moving.
Errors that change the stimulus
An upright torso shifts the exercise away from the strong acceleration position. Hips that rise high usually indicate that the load, friction, or fatigue has exceeded the athlete's ability to maintain posture. Looking up can also encourage the ribs to flare and the back to lose its neutral alignment.
Locked elbows create another problem. They can make the athlete press through the arms while the lower body loses rhythm, and they reduce the ability to absorb small changes in sled resistance. Keep the shoulders firm, but let the arms transmit force without becoming rigid supports.
If the athlete can't maintain the body line, the load has already become too heavy for the intended technique, regardless of how much effort the repetition requires.
Goal-Specific Loading Protocols and Workouts
Velocity-decrement loading solves a problem that body-mass formulas can't solve on their own. Instead of assigning the same percentage to everyone, establish an athlete's unresisted sprint speed, then select the sled load that creates the desired reduction in velocity. The target becomes a movement response, not a number on a plate.
A 2021 study found that a 25% velocity decrement occurred at loads ranging from 23% to 42% of body mass, a 50% decrement at 45% to 85%, and a 75% decrement at 69% to 131%. The authors concluded that velocity-decrement loading can be used reliably, but the load required is highly individual. Those ranges are reported in the study's load-prescription summary.
Match the protocol to the objective
For speed maintenance and sprint transfer, begin by finding a load that creates a smaller velocity decrement while preserving posture, rhythm, and aggressive ground contacts. Stop the set when the athlete starts reaching, rising, or losing the intended stride pattern. This is not the place to chase exhaustion.
For a strength-speed blend, use a moderate velocity decrement and focus on forceful steps that remain technically clean. The athlete should feel a clear increase in resistance, but the sled should still move with a repeatable rhythm. Record the load, surface, distance, and observed speed response so the next session can be compared fairly.
For force development, a larger decrement may be appropriate. The athlete will move more slowly, and the session should emphasize powerful projection through the legs rather than pretending that the movement is still maximal sprinting. Heavy work belongs where the goal calls for it, not as a default setting.
Use acute results carefully
Heavier resistance doesn't guarantee an immediate sprint benefit. One 2021 study reported that 20-meter sprint time wasn't significantly different from baseline after sled pushes at 50% and 100% of body mass when compared with a control group. That finding is a useful warning against assuming that a heavy push automatically creates a measurable acute change. The result is described in this analysis of sled-push sprint mechanics.
A practical session might pair technically crisp resisted pushes with full recovery, then use unresisted sprints to express the athlete's speed. If you want ideas for organizing those speed exposures, this Outrank sprint workout guide offers useful programming context. For conditioning, the same tool can be placed later in a session, but the coach should stop treating the work as sprint transfer once fatigue changes the movement.
Programming Templates for Athletes and Busy Professionals
Athletes need the sled to support the demands of their sport, not compete with them. Place acceleration-focused pushes early in a session when technical quality matters, and use more fatiguing work later only when conditioning is the priority. Two resisted sessions per week were used in the high school athlete study cited earlier, but that protocol shouldn't be copied blindly into every sport or training phase.
Athlete template
An athlete might organize the work around a high-quality resisted acceleration day and a separate session with a different emphasis. The first session uses a measured velocity decrement, controlled distances, and enough recovery for posture to remain stable. The second can use a different load or a more general conditioning role, provided it doesn't impair the next key practice.
Progress by improving the quality of the same target response before adding more load. If the athlete reaches the intended velocity decrement with cleaner steps and less unnecessary strain, that may be better progress than just putting another plate on the sled. Surface consistency is essential, because a change in friction can look like a change in strength.
Busy professional template
A busy professional needs fewer moving parts. Use a short session with a thorough warm-up, a limited number of technically strong pushes, and a clear stop rule based on posture and speed. For readers building efficient weekly routines, this Outrank strength and conditioning guide can help frame where sled work fits. The goal is to finish with useful training stress, not to create soreness that disrupts work or the next session.
A simple progression is to keep the surface and distance consistent, then adjust only one variable when the current workload feels repeatable. If resisted running interests you as a complementary option, this run parachute training guide offers context on another form of external resistance, though a parachute and a sled don't create identical loading conditions.
The trade-off is straightforward. Athletes can devote more time to profiling and recovery, while busy professionals benefit from a compact, repeatable prescription. Both groups need the same technical standard.
Tracking Progress and Integrating with Coaching Tools
A sled log should record more than the weight on the frame. Track the surface, distance, direction of travel, intended velocity decrement, technical quality, and the athlete's perceived effort. Without those details, a heavier load in the next session may only reflect a slipperier floor or better conditions.
A coach can build a simple decision loop. First, observe an unresisted reference effort. Next, add resistance and watch whether the athlete reaches the intended speed reduction without losing the body line. Finally, record whether the athlete finishes with controlled deceleration and repeatable steps.
A practical coaching scenario
Suppose an athlete's sled moves quickly during the first push but slows dramatically on later repetitions. The coach shouldn't immediately reduce the load or add more rest based on one impression. Compare the later repetition with the planned velocity zone, technical breakdown, and subjective effort. If the athlete's trunk rises and the steps lengthen, the session may have exceeded its speed-transfer purpose even if the sled still moves.
Video review can make that decision more reliable. A coach can compare the first and last repetitions for trunk angle, hand position, step length, and finish control. The aim isn't to generate a perfect score. It's to identify the first technical change that signals the prescription no longer matches the goal.
Where digital tools fit
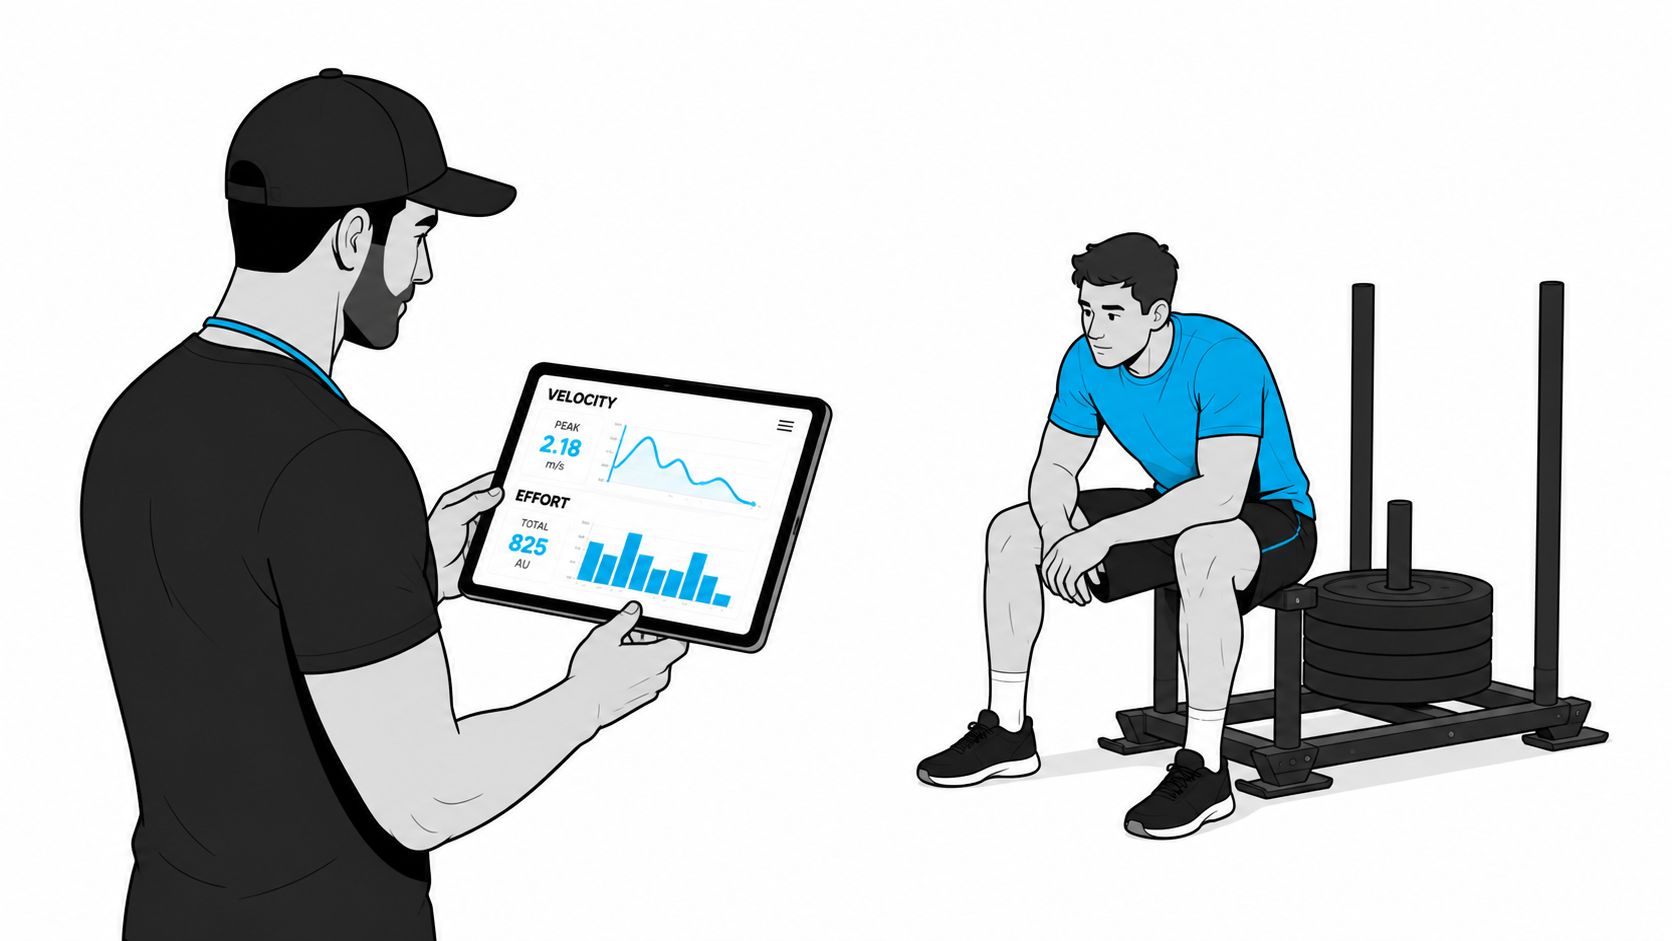
A fitness platform can organize the record, surface trends, and keep the prescription consistent across sessions. Thrive X Fitness includes structured workout plans, progress tracking, adaptive programming, and form review from a short video clip, which can support a coach or trainee monitoring sled-push technique alongside other movements.
Technology doesn't replace coaching judgment. It helps keep the relevant context together, especially when a training plan must adapt around sport practice, work demands, or changing fatigue. The most valuable output is a clear adjustment, such as preserving the load, changing the surface, extending recovery, or moving the exercise to a different part of the session.
Summary
Push sled training works best as a measured horizontal-force exercise, not an automatically heavy conditioning drill. The load should match the athlete's target velocity decrement, because body-mass percentages can produce very different responses between individuals and surfaces. A strong forward lean, neutral spine, short powerful steps, and controlled deceleration protect the intended stimulus. Athletes can use the sled to support acceleration and force development, while busy professionals can keep the work brief and repeatable. Tracking load, surface, speed response, technique, and effort makes each session easier to adjust.
ThriveXDNA connects training plans, progress tracking, adaptive programming, and short form-video review through Thrive X Fitness, which can help you manage push sled work with the rest of your program. Visit ThriveXDNA to explore the platform and build a more measurable training workflow.
Frequently Asked Questions
How heavy should a push sled be?
There isn't one correct load for every athlete. A velocity-decrement approach matches resistance to the desired reduction in sprint speed, and research has found wide individual variation in the body-mass load needed to create the same decrement. Choose the load that produces the intended response while preserving posture and step quality, then account for the surface and friction.
Is a heavier sled always better?
No. Heavier resistance can increase the force demand, but it can also slow the movement and change the technical purpose of the exercise. A heavy push may suit force development, while a smaller velocity decrement may suit speed maintenance or sprint transfer. The correct choice depends on the outcome, not on how difficult the sled feels.
What does good push sled technique look like?
Good technique combines a strong forward lean, neutral spine, stable hand position, and short powerful steps. The athlete should drive through the legs rather than pulling with locked elbows or folding at the waist. Hips rising high, looking up, overstriding, or losing control at the finish are signs that the load, friction, or fatigue may be changing the intended movement.
Can push sled training replace sprinting?
It shouldn't replace all sprinting. The sled is useful for horizontal force and resisted acceleration work, but athletes still need opportunities to express speed without external resistance. Use the sled to complement sprint training, selecting the load and velocity decrement according to the session's purpose.
What should I track during sled sessions?
Record the load, surface, distance, intended velocity decrement, technical quality, and subjective effort. Comparing those details helps you tell whether a change in performance came from the athlete or from different friction and setup conditions. Video can also reveal changes in trunk angle, stride pattern, hand position, and deceleration control. If you want a broader framework for logging training quality and workload, this Outrank guide to strength and conditioning provides useful context.
How can busy professionals use push sled training?
Keep the session compact and prioritize technically clean repetitions. Use a consistent surface and distance, establish a clear stop rule, and change one variable at a time as the workload becomes repeatable. This approach keeps the exercise useful without allowing fatigue to spill unnecessarily into work or later training. For readers who want a simple weekly structure around short, effective sessions, this Outrank workout guide can help organize the rest of the week.